How to Make a Table Top
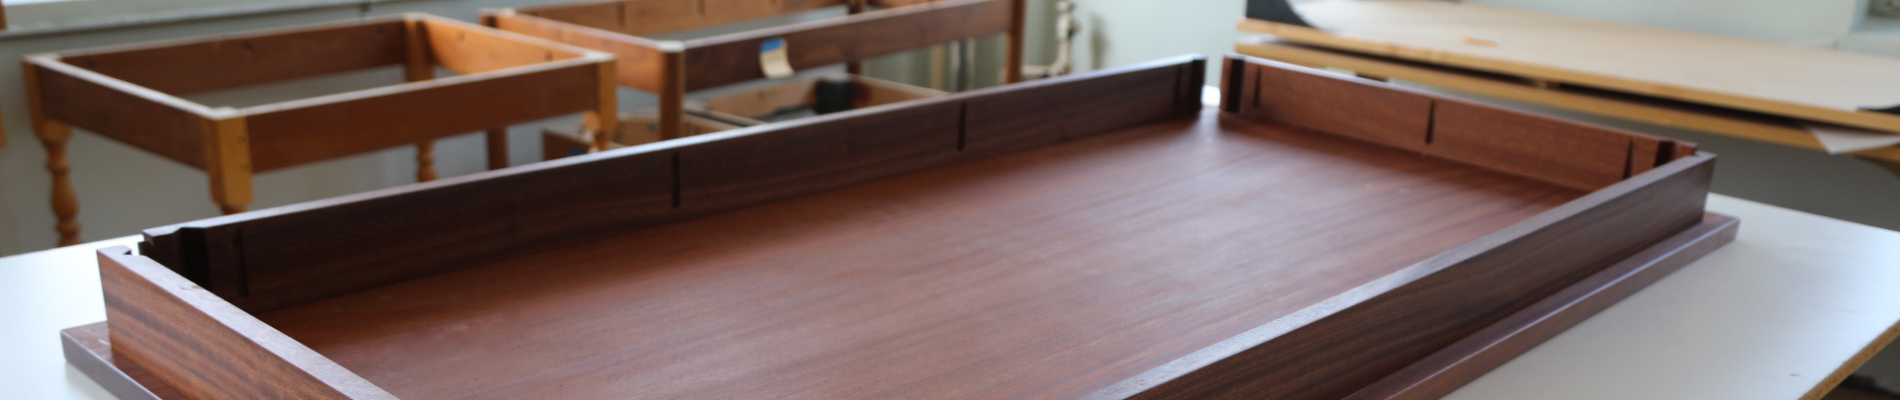
Table tops; The Face of Your Space
Table tops. The unsung heroes of the kitchen, dining room, or living room space. Few things pull a room together like a great table top, however it’s often one of the more overlooked pieces of furniture within your home. Why? Function wins out over fashion most of the time.
Not at Tablelegs.com! We stand by our belief that a great table top can be both functional and beautiful, not to mention durable! We offer a range of styles, thicknesses, lengths, widths, and finishing to bring your tabletop from workable to wow-able!
Wood You Believe it?
A great table top starts with a great piece of wood. All of our table tops and countertops are crafted from 8” or wider boards grown in Vermont, making each piece its own unique work of art. We mill and craft all of our pieces of wood to capture the natural beauty of the wood grain in our table tops. Different species of wood create different grain patterns, colors, and other fingerprints of the tree they came from to create a one of a kind woodworking project you’ll love.
How Do I Start?
Building a table top isn’t as easy as slapping some legs on a board. If you’re looking for an heirloom table that will last for generations, look no further than our custom wood table tops, pre-assembled and ready to create the table of your dreams. You can customize your table with different species of wood, sizes, edges, finishes, and more. Check out our custom shaped table top or countertopoptions as well, for those projects that you can’t quite find the perfect pre-made fit for.
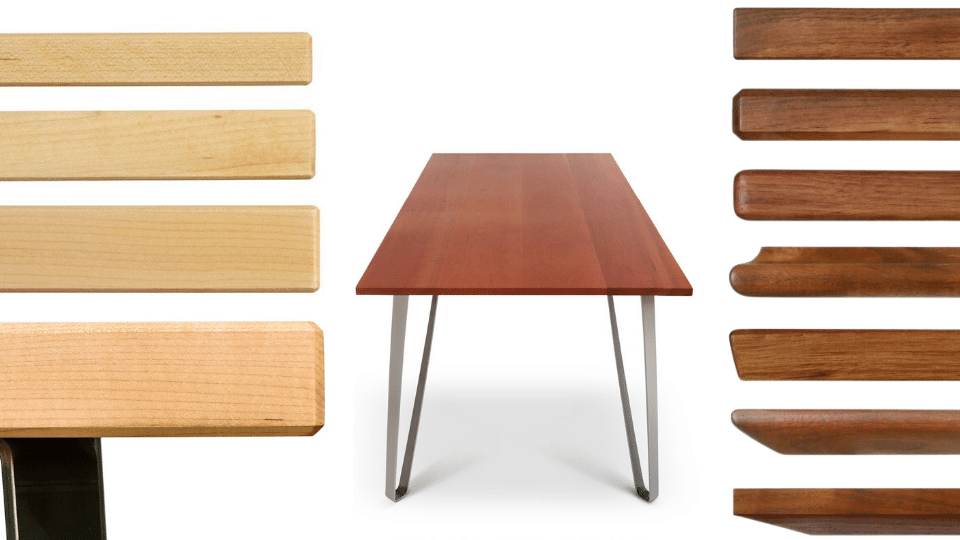
1. Choosing Your Thickness
The thickness of your countertop determines other design elements of your table. Thicker pieces of wood are used to create a thicker table top, and may require a different apron and leg system than other table tops. We have many different styles and sizes of legs to support any thickness of tabletop you could want for your kitchen or dining space.
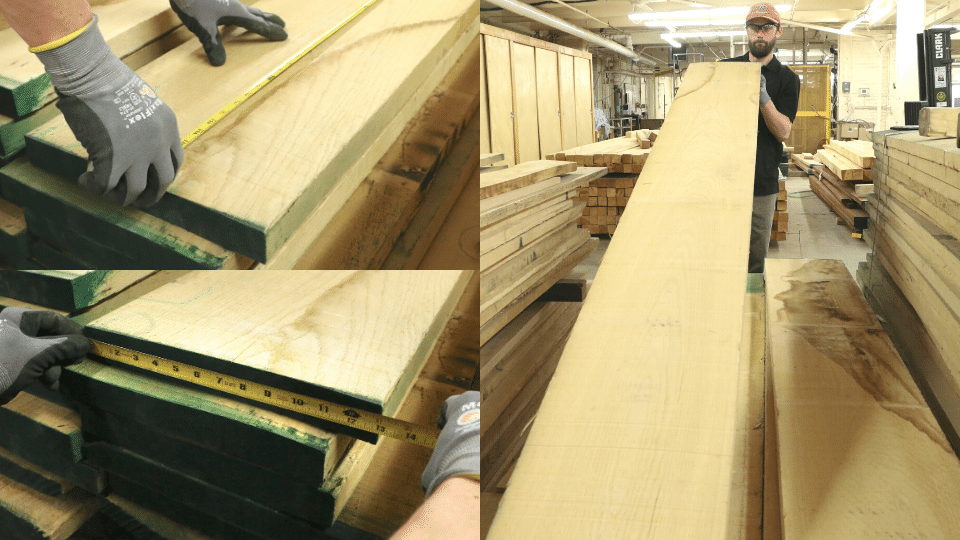
2. Selecting Your Boards
At Tablelegs.com, all of our countertops are created starting with kiln-dried 8” or thicker boards. We select our boards by hand, creating a unique work of art with each piece. When you join them all together to build a table top or countertop, that’s when the piece really starts to come to life! Each grain pattern is preserved within the boards, showcasing each tree’s unique beauty in your table top.
3. Joining Your Boards
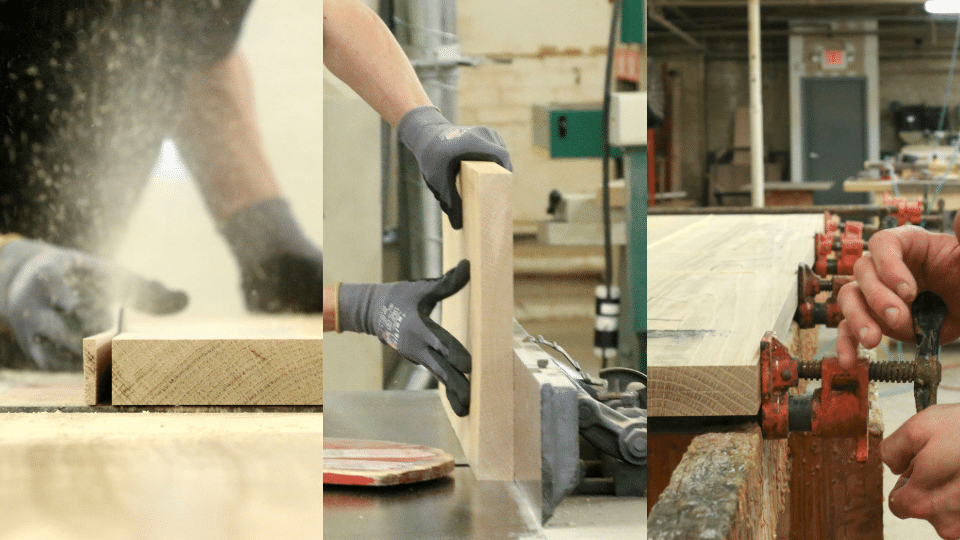
Okay, so you have these beautiful boards and a design in mind - now what? It’s time to begin the process of joining your boards to lay the foundation of your table top.
Glue joints are commonly used in creating a table top, as you do not want any screws or nails marring the surface of your boards. Getting a well-fitted, tight joint is the secret to a well-made table top.
Before applying the glue, you want to be sure your pieces of wood fit as tightly as possible next to each other, meaning when they’re laying side by side they are not warped or curved at any point along the length of the board. If they are, you can plane/sand those imperfections out prior to gluing up to ensure the strongest, tightest fit possible.
Once you’ve gotten your planks arranged how you’d like them, apply glue to your edges, creating glue boards. Edge gluing, the method we use at Tablelegs.com, requires patience, attention to detail, and precise pressure. Pressure can be added utilizing clamps, which should be applied as evenly as possible across the table top.
Clamping pressure varies depending on what is needed throughout the project. The goal is to create an even, finished product once it is dry. There will likely be some unevenness and excess glue - this will be taken care of in the finishing process.
4. Edging It Out
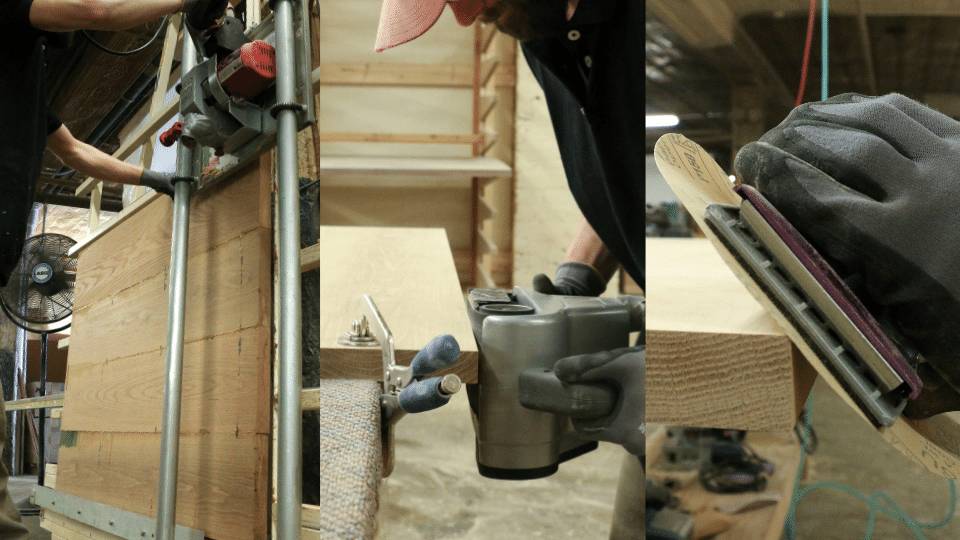
Once you’ve let your tabletop sit for 8-10 hours, utilizing clamping pressure to let the wood glue dry, it’s time to create your edges. Edges can be made as literal edging to the table top, like a frame around the wood, or are commonly used as a table apron to add durability and stability to your new table top.
One of the common ways to join edges is using a method involving “pocket holes.” Pocket holes are drilled into boards to minimize splitting when screwing them together. By using a pocket hole, the application of a pocket screw keeps the board in one piece, as you’re often joining edges going into the cut end of the board.
You can also utilize the edge joint method, similarly creating a tight bond with clamping pressure and eliminating the need for screws altogether. Many carpenters utilize a combination of edge joint and pocket holes to ensure long lasting results, often filling their pocket holes with wood filler before joining their edges together.
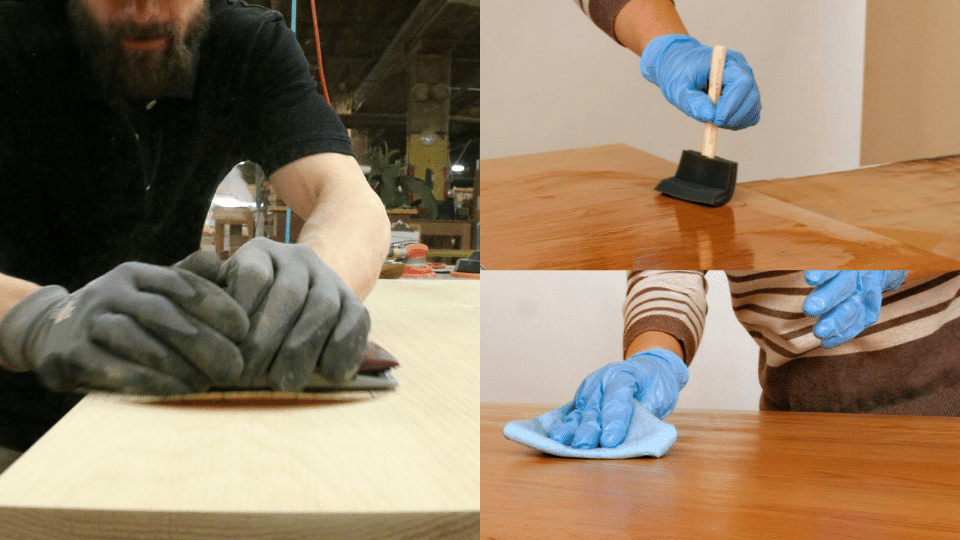
5. Finishing It Up
Remember that excess glue we mentioned before? Now is the time to get rid of it! Most excess glue that results from clamping can be sanded off in the finishing stage.
You want to make sure you are always sanding with the wood grain, and utilize wood filler as needed to fix any imperfections that may arise. Take this opportunity to refine any unfinished or uneven spots in your table top as well.
The final finishing touch? Is it making sure your square edged joint is even? Is it attaching your legs to your glued up apron? No! It’s remembering to use our Monocoat Natural Oil finish to really lock in those details!